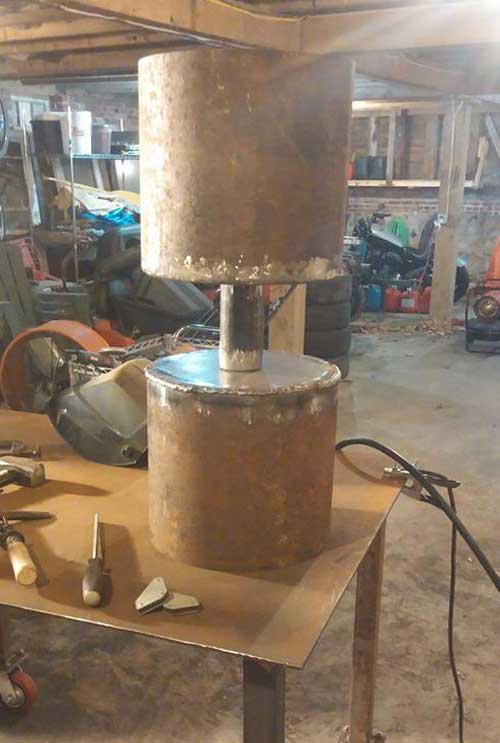
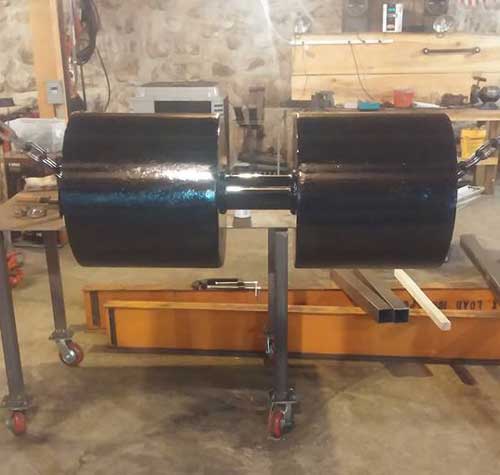
Thanks to TJ for the great project submission! We really appreciate you taking the time to send this description of your work and the photos! Great job! "Hey guys, I saw your post about sending in a few pictures of projects I completed using your Versa Cut 40 plasma cutter and your Eastwood 200 amp tig machine. It's an oversized dumbbell that's going to be used in power lifting competitions in the new England area. The final weight is 125 lbs and it's made out of 1/4in steel plate, 12in pipe with 3/8 wall thickness, 3in pipe for the grip and 2in pipe to load weights on the inside. The plasma cutter and the welder both worked great! Solid products!"
- Register
- Log in
- Wishlist (0)
- My Cart (0) You have no items in your shopping cart.
- 2025
- 2024
- 2023
- 2022
- 2021
- 2020
- 2019
- 2018
- 2017
- 2016
- 2015
- 2014
- 2013
- 2012
- 2011
- 2010
Blog posts tagged with 'eastwood'
Thanks to Nick of Milltown, NJ, who sent us this pic of some welds he did on exhausts at his shop, Ridgway Speedshop, using his Eastwood 175 Mig Welder. Nice work! He says of the welder: "Very nice for the price. Had a small hiccup in the beginning with the gas regulator but Eastwood was very prompt with a warranty replacement and made the exchange easy." 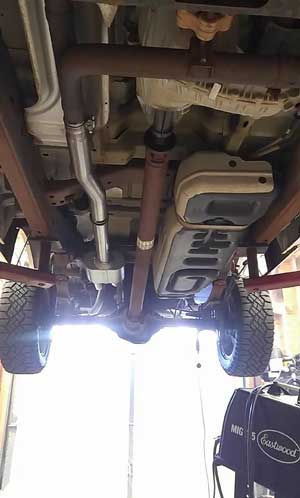
Whenever you are using a welder, such as a MIG welder or a TIG welder, it is crucial that you know how to adjust the flow rate of shielding gas. When assembling and setting up your welder, once you connect your shielding gas regulator, the gas flow rate must be adjusted in order to ensure that the right amount of shielding gas is flowing over your weld. If too little gas is flowing from your welder, you will be prone to contamination and excessive spatter. If too much gas is flowing, you will be wasting your gas, which can negatively affect the result of your weld. Typically, there are two gauges on the shielding gas regulator, one to mark the gas flow rate and one to mark the gas tank pressure. The first thing to do to adjust the flow rate of your shielding gas is open your shielding gas tank valve the whole way. Adjust the knob on the regulator so that it is marked at about 30 CFH. Now, turn on the welder and trigger the torch switch so that the gas will start to flow. When you trigger the torch switch, the gas flow should cause the needle on the gas flow gauge to descend to a steady and accurate reading. Next, the gas flow should be set to about 20 CFH when it is flowing, which is the most common flow rate used when welding. Sometimes this needs to be readjusted as a slight breeze could alter the flow and weaken the shielding gas consistency surrounding the weld. Once you have adjusted the flow rate, you are free to weld. Just remember to close the gas valve on the bottle when you are finished welding. This blog is a repost, courtesy of Eastwood.
